Suspension noise in Tesla vehicles is common, particularly on Model 3, Model Y, and Model X platforms. Many noises can be diagnosed and fixed without visiting a Tesla service centre. This guide covers how to identify the root cause, implement cost-effective DIY solutions, and determine when professional help is necessary.
Identifying Tesla Suspension Noise: What You're Hearing
Different sounds point to different problems. Misdiagnosing the issue leads to wasted time and unnecessary repairs.
Clunking noises over bumps and speed bumps
Clunking sounds when driving over speed bumps or potholes typically indicate play in ball joints, upper control arms, or sway bar end links. This sharp, metallic noise occurs when your wheel hits the bump. Many owners describe it as a hollow "knock" resonating through the steering wheel or floorboard.
A single clunk suggests minor wear; repeated clunking on small bumps indicates advanced deterioration. This is one of the most common suspension noises reported on Tesla forums.
Watch OutClunking noises often worsen rapidly. What starts as a single knock per week can become constant within a month, risking damage to adjacent components and compromising vehicle stability.
Creaking, squeaking, and rattling sounds
Creaking and squeaking typically come from dried-out or torn rubber bushings, often worse in cold weather. Rattling sounds usually indicate loose bolts or fasteners on the subframe, knuckle, or suspension arms. Unlike creaking, rattling is rhythmic and increases with vehicle speed.
Moisture intrusion accelerates corrosion. Once water enters through a torn rubber boot, component degradation accelerates rapidly, particularly in damp climates where winter salt spray and standing water cause faster deterioration.
Pinging and metallic noises
Pinging or high-pitched metallic sounds usually come from the knuckle bearing or compliance arm bushings. These noises occur during tight cornering when lateral forces stress the suspension. This noise type is less common but more serious, knuckle bearing failure can affect wheel alignment and brake performance.
Common Suspension Components That Fail in Tesla Vehicles
Understanding which components fail most often helps you prioritise diagnostic efforts.
Ball joints, upper control arms, and lateral links
Ball joints are spherical connectors allowing vertical suspension movement while maintaining wheel alignment. Tesla's upper control arms and lateral links work with these joints to keep the wheel centred. When ball joints wear, they develop play, movement where there should be none.
The upper control arm experiences significant stress during cornering. Lateral links, which control side-to-side wheel movement, experience similar wear. Both connect to the knuckle through ball joints that eventually deteriorate.
Pro TipTest ball joint wear yourself. With the car safely lifted on axle stands, grab the wheel at 3 o'clock and 9 o'clock positions and try to rock it side to side. Any play indicates a worn ball joint.
Sway bar end links and compliance arm bushings
Sway bar end links connect the sway bar to suspension arms. These small components experience enormous stress during cornering. When worn, they allow the sway bar to rattle against the suspension.
Compliance arm bushings are rubber components allowing controlled movement while isolating vibration. When they age, they lose elasticity and crack. Water entering through cracks accelerates rubber degradation exponentially. Both components are relatively inexpensive to replace (under £100 for parts).
Knuckle bearings allow your wheel to spin freely while supporting vehicle weight. Bearing failure manifests as pinging or grinding sounds and requires professional attention. Worn rubber bushings throughout the suspension cause creaking and squeaking. Lubrication through grease injection can extend bushing life by 12-24 months.
What You'll Need: Tools and Materials for DIY Diagnosis
Essential tools:
Car jack and at least two axle stands
Torque wrench
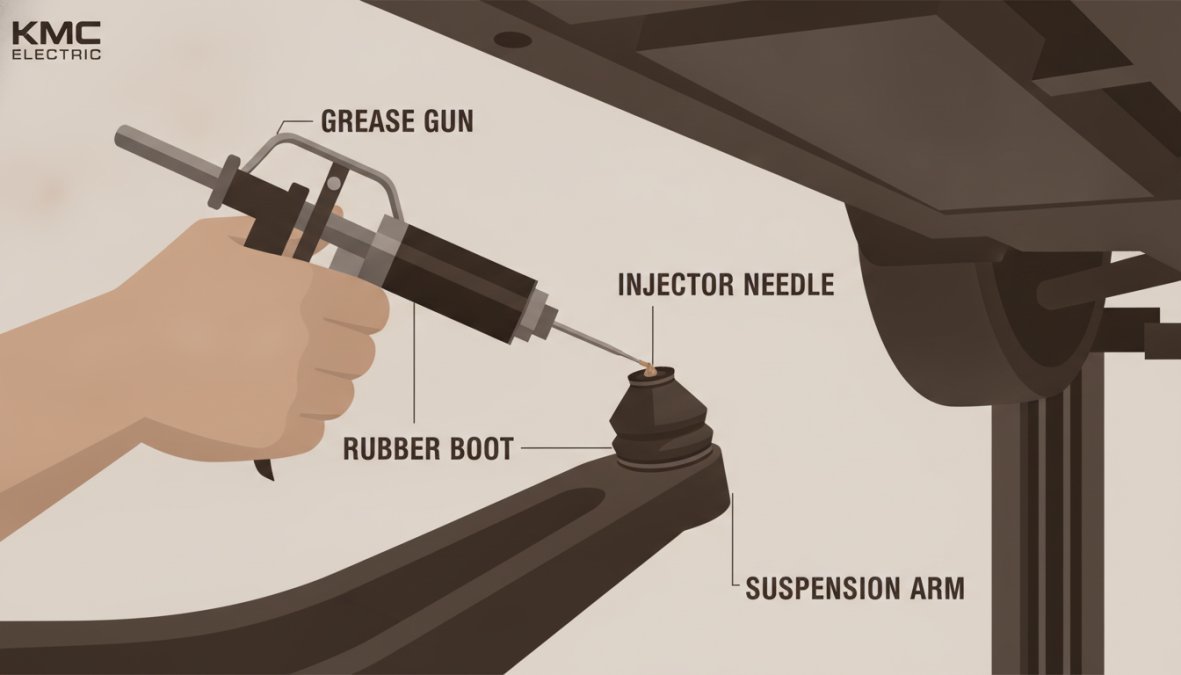
Grease gun with 400g cartridge and injector needle attachment
Flashlight or headlamp
Socket set (metric, 8-19mm)
Pliers and adjustable wrench
Safety glasses and work gloves
Materials for temporary fixes:
Lithium-based grease cartridges (£6-8 each; you'll need 2-3 for full suspension)
Rubber boot repair tape
WD-40 or penetrating oil
A quality grease gun costs around £15-20 and pays for itself on the first repair.
Step-by-Step: How to Diagnose and Fix Tesla Suspension Noise
(/page/tesla-suspension) Noise]
Step 1: Safely lift your Tesla and inspect for visible wear
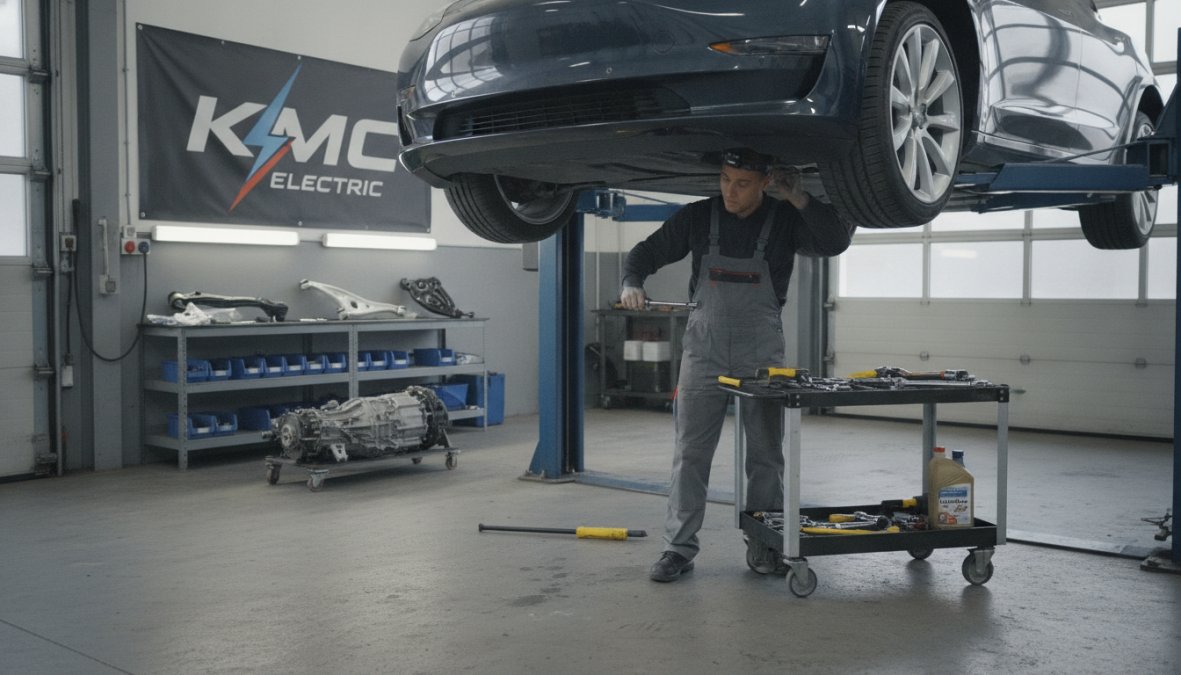
Park on level ground and engage the handbrake. Loosen wheel bolts while the vehicle is on the ground. Position your jack under the designated lift point (consult your owner's manual). Lift approximately 30cm, then position your first axle stand under the subframe. Lower the vehicle onto the stand, leaving the jack as backup. Repeat on the opposite side. Never work under a vehicle supported only by a jack.
Step-by-step visual guide for suspension noise
Visually inspect all visible suspension components for:
Torn or cracked rubber boots around ball joints
Visible corrosion or rust
Grease leaking from joints
Loose bolts or fasteners
Cracks in rubber bushings
Take photographs of any damage for documentation.
Step 2: Check ball joints and control arms for play
Grab the wheel at the 3 o'clock and 9 o'clock positions. Apply firm pressure side to side, watching for movement. Any play indicates wear. Next, grab at 12 o'clock and 6 o'clock positions and pull upward, then push downward. Again, any movement suggests worn components.
Repeat on the opposite wheel. Asymmetrical wear suggests a specific component failure rather than age-related wear. This test takes approximately 10 minutes per wheel and requires no special tools.
Key TakeawayIf the wheel moves more than 5mm in any direction when you apply firm pressure, professional diagnosis is warranted.
Step 3: Lubricate bushings with grease injection
If your inspection reveals torn boots but no obvious ball joint play, grease injection is your first fix. This temporary solution typically extends bushing life by 12-24 months.
Insert the injector needle into your grease gun. Locate the rubber boot around the affected joint. Position the needle at the tear and inject grease until it seeps from the opposite side. Use moderate pressure, forcing grease too aggressively ruptures the boot further. Inject approximately 20-30ml of grease per joint.
This process takes 20-30 minutes for a full suspension and costs under £20. Many owners report that creaking noises disappear entirely after this treatment.
Step 4: Test and verify the noise has diminished
Lower the vehicle carefully to ground level. Drive slowly over a bumpy surface and listen carefully. Compare the noise level to your baseline. If creaking or squeaking has diminished significantly, the grease injection worked. If clunking persists, ball joint wear is likely and professional replacement becomes necessary.
Tesla Control Arm Replacement: When DIY Fixes Aren't Enough
Worn ball joints and control arms require professional replacement. This involves removing the wheel, disconnecting multiple fasteners, and precisely realigning the suspension. Improper installation affects steering response, tyre wear, and vehicle stability.
The process typically takes 2-3 hours per side. A technician removes the old arm, inspects the knuckle bearing and adjacent components, installs the new arm, and performs full wheel alignment. Alignment is critical, even 0.5 degrees of deviation causes uneven tyre wear and handling issues.
Best ForProfessional control arm replacement is essential if you're experiencing consistent clunking noises, visible ball joint wear, or if DIY grease injection hasn't resolved creaking after 4-6 weeks.
Grease injection is your most cost-effective option at under £25 in materials. Tightening loose fasteners costs nothing and sometimes eliminates rattling entirely. Replacing sway bar end links is a moderate DIY project costing £30-50 in parts and taking 1-2 hours.
When DIY approaches haven't resolved your suspension noise, professional diagnosis clarifies exactly what needs repair. Proper diagnosis prevents wasting money on unnecessary component replacement. A comprehensive diagnostic process includes complete suspension inspection, play testing on all joints, visual assessment of bushings and boots, wheel alignment measurement, and road testing to correlate noises with driving conditions.
Tesla Suspension Warranty: What's Covered and What Isn't
Tesla's factory warranty covers suspension components for 4 years or 80,000 miles, whichever comes first. This includes ball joints, control arms, sway bar end links, and bushings. However, the warranty explicitly excludes wear items, components designed to deteriorate over time.
Rubber bushings are classified as wear items and aren't covered even within the warranty period. Ball joints and control arms are covered only if they fail due to manufacturing defects, not normal wear. A ball joint failing at 60,000 miles due to a defect is covered; one wearing out at 80,000 miles due to normal use is not.
For out-of-warranty vehicles, professional independent service identifies suspension issues before they become catastrophic, extending your vehicle's service life and preventing expensive emergency repairs.
Common Mistakes to Avoid When Fixing Suspension Noise
Ignoring noises. Suspension noises almost always worsen over time. Early intervention prevents more expensive repairs.
Replacing parts without diagnosis. Proper diagnosis prevents wasting money on unnecessary replacements.
Attempting suspension work without proper support. Never work under a vehicle supported only by a jack. Axle stands are essential.
Over-tightening fasteners on aluminium components. Use a torque wrench and follow manufacturer specifications exactly.
Delaying professional alignment after suspension work. Improper alignment ruins tyres and handling.
Mixing OEM and aftermarket parts indiscriminately. Stick with one or the other for complete suspension repairs.
Suspension noise in your Tesla is frustrating but rarely an emergency if diagnosed correctly. Start with visual inspection and play testing, these simple steps identify 80% of suspension issues without cost. If DIY grease injection and fastener tightening don't resolve the noise, professional diagnosis becomes worthwhile. Contact a qualified specialist for a suspension diagnostic appointment and get clarity on what your Tesla actually needs.
Frequently Asked Questions
Why is my Tesla suspension making a clunking noise over bumps?
Clunking noises typically result from worn ball joints, loose control arms, or failing sway bar end links. Moisture intrusion causes rubber bushings to deteriorate, creating play in suspension components. When your Tesla hits bumps or speed bumps, this play allows metal-to-metal contact, producing the clunking sound. A professional inspection can pinpoint the exact component causing the noise and determine whether lubrication or replacement is needed.
Can I fix Tesla suspension noise myself, and how much will it cost?
Minor suspension noise from dry bushings can often be addressed with DIY grease injection using a grease gun and injector needle—a solution costing under £50 in materials. However, if ball joints have excessive play or control arms are damaged, professional replacement is necessary. KMC Electric can diagnose the issue and advise whether temporary lubrication will suffice or if component replacement is required. Out-of-warranty repairs vary depending on which suspension parts need attention.
Is Tesla suspension noise covered under warranty?
Tesla's warranty typically covers suspension defects for 4 years or 50,000 miles, whichever comes first. However, wear-and-tear items like bushings and grease are often excluded. If your vehicle is within warranty, Tesla service can address covered faults, though independent specialists like KMC Electric can provide faster diagnosis and cost-effective alternatives for out-of-warranty vehicles or when you want a second opinion before warranty expiry.
What's the difference between temporary grease injection and replacing suspension components?
Grease injection temporarily restores lubrication to dry bushings and can reduce noise for 6–12 months, making it ideal for quick fixes on older vehicles. However, it doesn't address worn ball joints or damaged control arms—components that require actual replacement. Professional inspection by technicians like those at KMC Electric determines whether your Tesla needs permanent repair or if lubrication will extend service life cost-effectively before a full suspension overhaul becomes necessary.