Registration Accepted.
Password reset email sent.
Blog >
Tesla Model X Repair Guide: What Every Owner Should Know Tesla Model X Repair Guide: What Every Owner Should Know
May 16, 2026 by Tim (KMC Electric)
Table of Contents
Last Updated: May 16, 2026
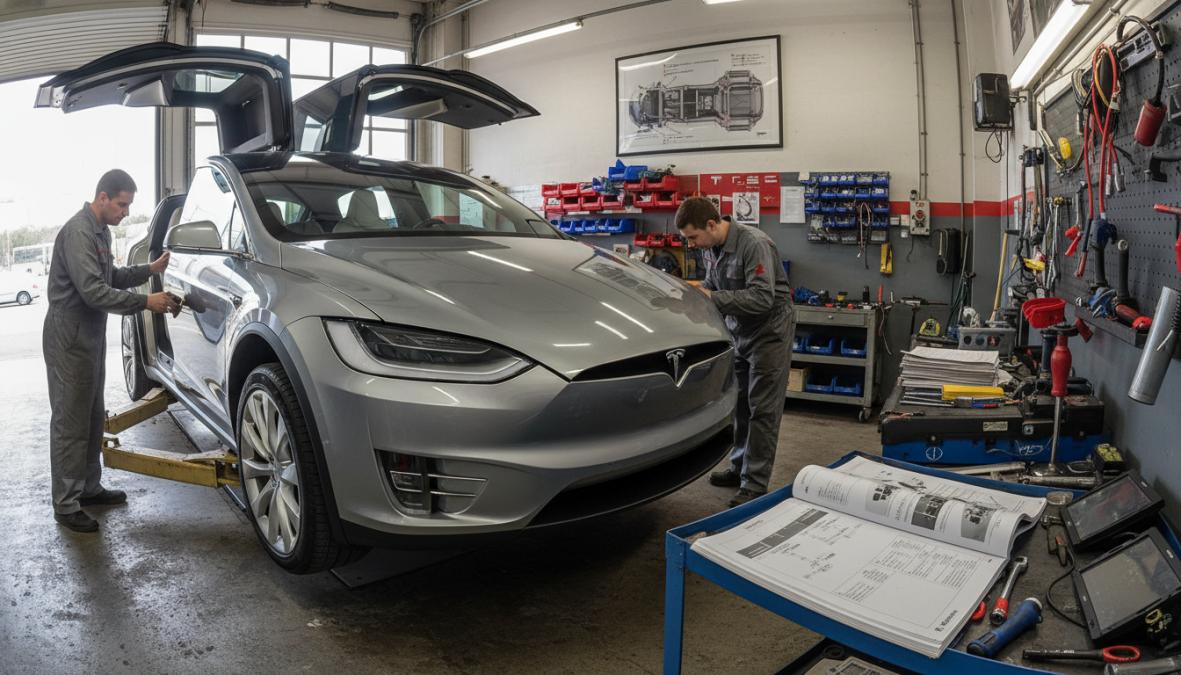
Owning a Tesla Model X comes with a maintenance reality that many buyers underestimate: these vehicles are sophisticated machines with unique service requirements, and getting repairs wrong can be expensive. This tesla model x repair guide from KMC Electric covers everything from reading the official workshop manual to diagnosing falcon wing door faults, so you can make informed decisions about what to fix yourself and when to call a specialist. Below, we'll walk through the service manual structure, maintenance schedule, common faults, diagnostic tools, and the real cost of getting repairs done right. The detail here goes further than most guides because the gap between what the official documentation says and what actually works in practice is wider than Tesla owners expect.
Tesla Model X Repair Guide: Understanding the Service Manual
The Tesla Model X Service Manual is the authoritative technical reference for all repair and maintenance procedures on the vehicle. It covers torque specifications, wiring diagrams, parts catalogs, collision repair procedures, and flat rate times, making it the essential starting point for any serious repair work.
Tesla publishes its workshop manual through its online service portal, accessible to approved repair facilities and independent technicians. The manual is model-year specific, so a procedure for a pre-Palladium Model X may differ significantly from a post-Palladium variant. This distinction matters because the Palladium refresh introduced revised suspension geometry, updated drivetrain configurations, and redesigned interior panels, all of which carry different torque specs and removal sequences.
What the Workshop Manual Covers
The workshop manual is organised into distinct sections: general information, body and trim, chassis, drivetrain, electrical systems, and HVAC. Each section contains step-by-step repair procedures, diagnostic flowcharts, and parts catalog references. Wiring diagrams are particularly detailed, covering high-voltage battery circuits, motor controllers, and the vehicle's CAN bus architecture.
One thing most owners don't realise: the manual also includes owner-facing maintenance schedules, which align with what Tesla's service appointment system recommends. Cross-referencing both gives you a clearer picture of what's genuinely required versus what Tesla's app might flag as advisory.
Torque Specs, Fasteners, and the Right Wrenches
Getting torque specifications wrong on a Tesla Model X is not a minor issue. The vehicle uses a mix of metric fasteners across its aluminium-intensive body structure, and overtightening can strip threads in castings that are expensive to replace.
The workshop manual specifies torque values in Newton-metres for all critical fasteners, including suspension mounting points, brake caliper bolts, and drivetrain components. For tight-access areas, particularly around the rear motor cradle and falcon wing door hinges, a crowsfoot wrench or offset wrench is often the only practical option. A standard socket set won't reach many of these points.
Pro TipWhen working on falcon wing door hinges or rear suspension components, always use a calibrated torque wrench rather than estimating by feel. The aluminium subframe is particularly sensitive to overtorque, and thread repair on these castings requires specialist tooling.
A practical torque reference for common Model X fasteners:
Component | Torque (Nm) | Tool Required |
|---|
Wheel nuts | 175 Nm | 21mm socket |
Brake caliper bolts | 35 Nm | 13mm socket |
Suspension arm bolts | 120-150 Nm | Crowsfoot/offset wrench |
Drivetrain oil drain plug | 45 Nm | Hex key socket |
Falcon wing hinge bolts | 25 Nm | Torx socket |
Note: Always verify torque values against the model-year specific workshop manual before proceeding.
Tesla Model X Maintenance Schedule: What Needs Doing and When
The Tesla Model X maintenance schedule is lighter than a comparable internal combustion vehicle, but it is not maintenance-free. Several service intervals are safety-critical, and missing them has real consequences for brake performance and cabin air quality.
According to Tesla's official maintenance documentation, the Model X has defined service intervals for brake fluid, air filters, and tyre rotation. Understanding these intervals helps owners plan costs and avoid being caught out by advisory warnings that appear without much notice.
Cabin Air Filter and HEPA Filter Replacement
The Model X is fitted with both a standard cabin air filter and a HEPA (High Efficiency Particulate Air) filter, a combination that makes the vehicle's air filtration system genuinely effective at removing fine particulates. Tesla recommends replacing the cabin air filter every two years and the HEPA filter every three years under normal driving conditions.
In practice, owners in urban areas or high-pollution environments should replace both on the shorter end of the recommended interval. A clogged HEPA filter reduces airflow to the cabin and can cause the climate system to work harder, which draws more energy from the battery.
Replacement is a straightforward DIY task. The filters are located behind the front fascia area, accessible through the frunk. No special tools are required, though a trim removal tool helps avoid damaging the plastic clips.
Brake Fluid, Tire Rotation, and Wiper Blades
Brake fluid replacement is the most commonly overlooked service item on the Model X. Tesla recommends replacing brake fluid every two years regardless of mileage, because the fluid is hygroscopic and absorbs moisture over time, lowering its boiling point. On a vehicle that uses regenerative braking predominantly, the physical brakes are used less frequently, which means the fluid sits in the system longer and degrades without obvious warning signs.
Tyre rotation should occur every 10,000 to 12,000 miles. The Model X has a significant weight bias due to the battery pack, and uneven tyre wear is common without regular rotation. Check tread depth at each rotation and inspect for irregular wear patterns that might indicate suspension misalignment.
Wiper blades are a straightforward annual replacement. Use blades rated for the Model X's curved windscreen profile, as generic blades often produce streaking at the edges.
Watch OutSkipping brake fluid replacement on a Tesla Model X creates a real safety risk. Degraded fluid can cause brake fade under hard stops, even on a vehicle that relies heavily on regenerative braking. This is not an advisory item to defer.
Tesla Model X Common Problems: What Goes Wrong and Why
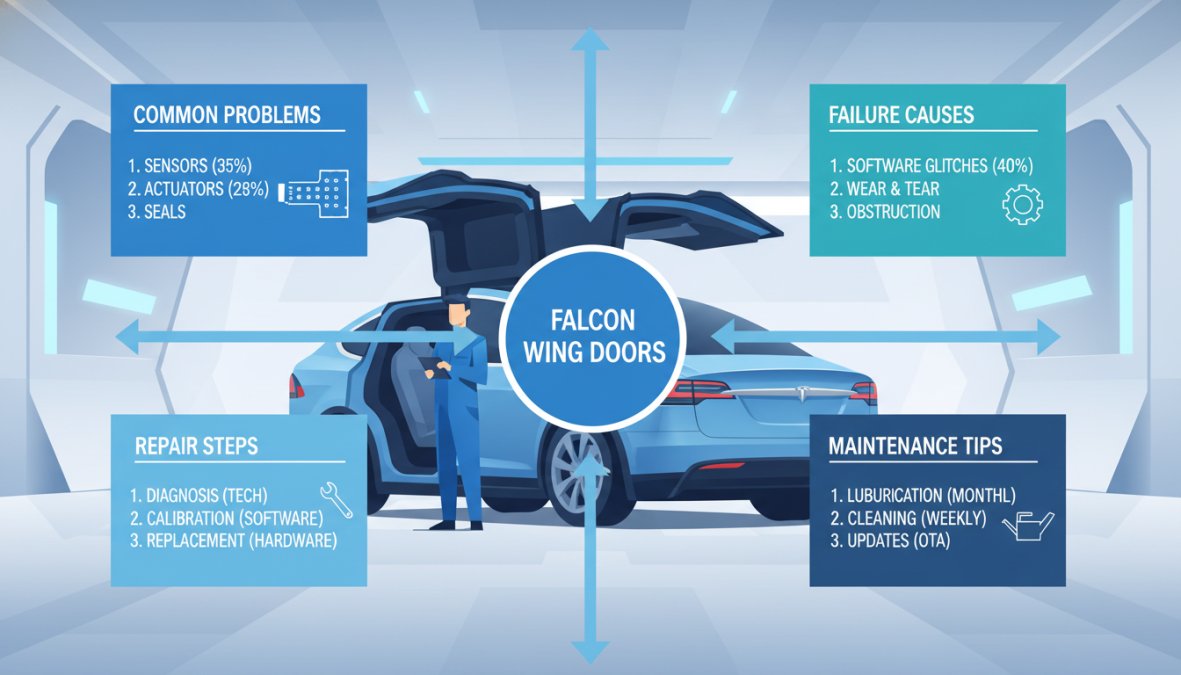
Tesla Model X common problems cluster around three areas: the falcon wing doors, suspension components, and brake caliper maintenance. Knowing these failure modes before they occur is the difference between a planned repair and an emergency one.
Falcon Wing Door Faults
The falcon wing doors are the Model X's most distinctive feature and its most fault-prone system. The doors use a complex sensor array and motorised hinge mechanism to detect obstacles and adjust opening angle. Common faults include doors that refuse to open or close, doors that open partially then stop, and error messages citing obstruction detection failures.
In many cases, the root cause is a sensor calibration issue rather than a mechanical failure. The door sensors can drift out of calibration after minor impacts or even temperature extremes, and a diagnostic reset through Tesla's service software often resolves the fault without any parts replacement.
Mechanical failures do occur, however. The hinge actuator motors and the door latch assemblies are wear items, and on higher-mileage vehicles, the motors can develop intermittent faults that worsen over time. Replacement requires careful torque management on the hinge bolts and a post-installation calibration procedure.
Suspension, Brake Caliper, and Drivetrain Issues
The Model X uses an air suspension system on most variants, and the air struts are a known wear item. Strut failures typically present as a vehicle that sits lower on one corner or takes longer than usual to level after startup. Replacement is not a DIY job: the system requires depressurisation before disassembly, and the new struts need calibration through the diagnostic software.
Brake caliper cleaning and lubrication is a maintenance task that Tesla's official schedule doesn't emphasise enough. Because the physical brakes are used infrequently due to regenerative braking, caliper slide pins can seize, causing uneven pad wear and, in severe cases, a stuck caliper. Annual caliper cleaning is a sensible preventive measure on any Model X.
Drivetrain oil is a genuine service item on the Model X. The front and rear motor gearboxes use a specific fluid that should be checked and replaced according to the workshop manual interval. KMC Electric stocks drive train oil and oil filters for Tesla vehicles, which makes sourcing the right parts straightforward for owners and independent technicians alike.
Tesla Diagnostic Software: How to Read and Use It
Tesla diagnostic software is the primary tool for reading fault codes, monitoring battery health, and calibrating replaced components on the Model X. Unlike traditional OBD-II readers, the Tesla diagnostic system communicates over Ethernet rather than the standard OBD port, which means generic scan tools don't work.
Tesla's proprietary diagnostic tool is available to approved service centres and independent specialists. Third-party diagnostic platforms, such as those used by independent EV specialists, can access a significant portion of the vehicle's fault data, though some calibration functions remain locked to Tesla's own tooling.
For owners, the vehicle's touchscreen provides a useful first layer of diagnostic information. The service menu (accessed through a specific button sequence on the touchscreen) displays tyre pressures, brake pad wear estimates, and recent fault codes. This is not a replacement for professional diagnostic equipment, but it gives owners a meaningful starting point before booking a service appointment.
Battery health monitoring is one area where independent diagnostic tools add genuine value. Tesla's official app shows a range estimate, but it doesn't provide detailed cell-level data. An independent battery health assessment, of the kind offered by specialists in Kettering and across Northamptonshire, gives a far more granular picture of battery condition, which is particularly useful when buying or selling a used Model X.
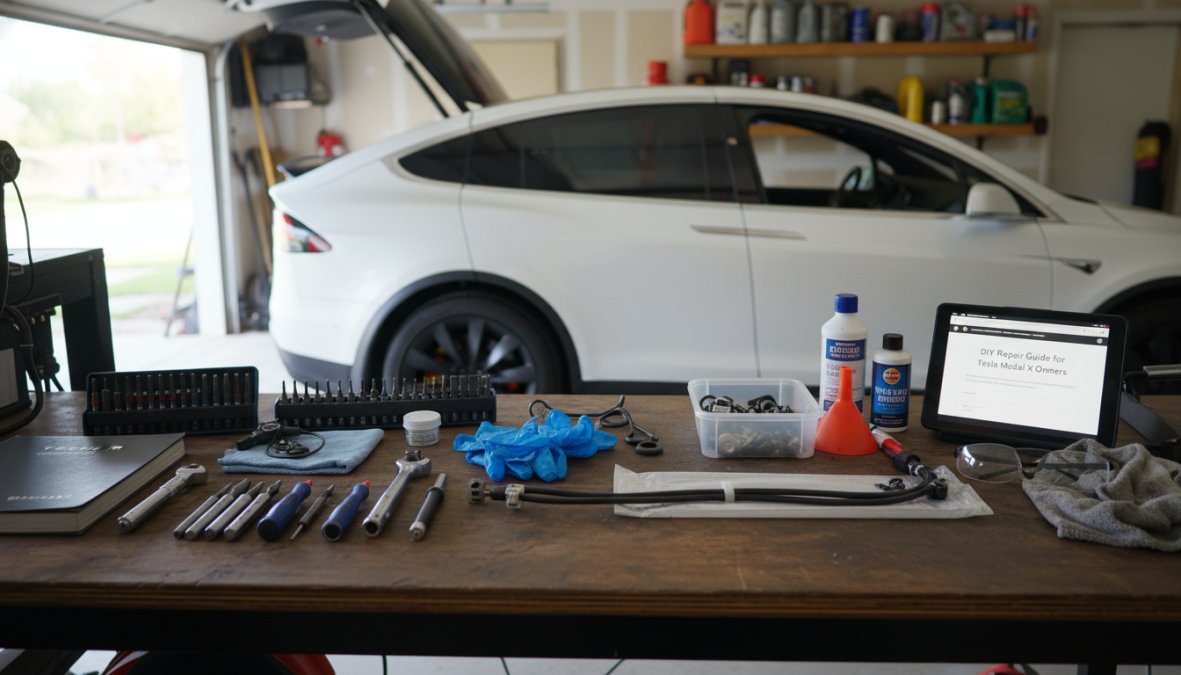
Most guides treat the Model X as a sealed unit that only Tesla can touch. That's not accurate. A meaningful range of maintenance and repair tasks are within reach for a competent DIY mechanic, provided they have the right tools and follow the workshop manual precisely.
Before starting any work on a Model X, assemble the following:
Calibrated torque wrench (0-200 Nm range)
Metric socket set (8mm to 24mm)
Crowsfoot wrench set (metric)
Offset wrench for tight-access fasteners
Trim removal tools (plastic, to avoid scratching)
OBD-Ethernet adapter or compatible third-party diagnostic tool
Insulated gloves rated for high-voltage work (if working near battery or motor systems)
Jack stands rated for at least 2,500kg per corner
The crowsfoot and offset wrench requirements catch many DIY mechanics off guard. Several suspension and drivetrain fasteners on the Model X are physically inaccessible with a standard socket, and attempting to use an ill-fitting tool risks rounding the fastener head, which turns a straightforward job into a specialist extraction task.
Common DIY Troubleshooting Steps
Cabin air filter replacement (estimated time: 30 minutes)
Open the frunk and locate the filter housing behind the front fascia panel.
Use a trim removal tool to release the plastic clips securing the panel.
Slide the old cabin air filter out, noting the airflow direction arrow.
Insert the new filter with the arrow pointing in the same direction.
Repeat for the HEPA filter in the adjacent housing.
Reattach the panel and confirm all clips are fully seated.
Brake caliper cleaning (estimated time: 45-60 minutes per axle)
Safely raise the vehicle on rated jack stands.
Remove the wheel using a 21mm socket (175 Nm torque on refitting).
Remove the caliper slide pin bolts and slide the caliper off the carrier.
Clean slide pins with brake cleaner and inspect for corrosion.
Apply fresh caliper grease to the slide pins.
Reassemble and torque caliper bolts to 35 Nm.
Pump the brake pedal before lowering the vehicle to confirm pad contact.
Key TakeawayThe most common DIY mistake on the Model X is skipping the post-reassembly torque check. Brake and suspension fasteners that are hand-tight but not torqued to spec can work loose under load, turning a maintenance job into a safety incident.
For the hand brake motor, which is a separate electric actuator on the Model X, KMC Electric supplies a Tesla Model S and Model X Hand Brake Motor at a competitive price point, avoiding the main dealer markup on this commonly replaced component.
Collision Repair Procedures and Flat Rate Times
Collision repair on the Tesla Model X is one of the most technically specific areas of the workshop manual, and it is also the area where owners are most likely to receive a repair quote they cannot evaluate. This section translates the key procedural requirements into plain English and gives you the framework to assess whether a repairer and their quote are credible.
Why Aluminium Changes Everything
The Model X uses an aluminium-intensive body structure, the same manufacturing approach Tesla adopted from the Model S platform. Aluminium offers a significant weight saving over steel, which matters for range, but it behaves fundamentally differently under collision damage and during repair.
Steel is ductile: it can be heated, reshaped, and work-hardened back toward its original form. Aluminium is not. Heat applied to a collision-damaged aluminium panel or structural section weakens the material at a microstructural level, reducing its ability to absorb energy in a subsequent impact. This is not a minor technical footnote, it is the reason Tesla's collision repair procedures explicitly prohibit heat-based straightening on structural aluminium components.
The practical consequence for owners: if a repairer proposes to straighten a damaged aluminium structural section rather than replace it, that is a non-compliant repair. It may look correct and pass a visual inspection, but the structural integrity of the vehicle in a future collision is compromised. Tesla's workshop manual is explicit on this point, and insurance assessors familiar with Tesla's approved procedures will flag it.
Structural Zones: What Can Be Repaired vs. What Must Be Replaced
Tesla's collision repair documentation divides the vehicle body into repair zones with different rules for each. Understanding these zones helps owners interpret repair assessments:
Non-structural panels (bonnet, doors, rear quarter panels): These can be repaired using cold aluminium repair techniques, planishing, shrinking, and filling, provided the damage does not extend to the underlying structure. Panel replacement is often more cost-effective than repair on heavily damaged sections, and Tesla's flat rate times reflect this.
Structural sections (A-pillars, B-pillars, sill assemblies, front and rear crash structures): These are replacement-only under Tesla's approved procedures. No straightening, no welding over existing structure. The crash structures at the front and rear of the vehicle are designed as single-use energy-absorbing components: once deformed, they must be replaced to restore the vehicle's designed crash performance.
Battery enclosure and mounting structure: This is the most critical zone. Any collision that involves contact with the battery enclosure requires a Tesla-approved structural assessment before the vehicle is returned to service. The enclosure is not just a housing, it is a load-bearing structural element. Damage that appears cosmetic from outside may have compromised the enclosure's ability to protect the battery pack in a subsequent impact. Tesla's procedures require specific inspection steps and, in many cases, enclosure replacement rather than repair.
Falcon wing door surrounds: The door aperture structure on the Model X is more complex than a conventional door opening because the falcon wing doors rely on precise aperture geometry for their sensor-guided opening sequence. Collision damage to the door surround that is not repaired to within Tesla's specified dimensional tolerances will cause persistent door fault codes and erratic door behaviour, even after the visible damage is addressed.
Watch OutIf a collision has involved the battery enclosure area, even at low speed, do not assume the damage is cosmetic. Request a written structural assessment from a Tesla-approved or Tesla-familiar repairer before driving the vehicle. The enclosure's external surface can appear undamaged while the mounting structure has been compromised.
How Flat Rate Times Work and How to Use Them
Flat rate times are the standardised labour hours that Tesla's workshop manual assigns to each repair procedure. They exist to create consistency in labour cost estimation across service centres and independent repairers. A front bumper cover replacement, for example, carries a specific flat rate time that reflects the steps required: removing the undertray, disconnecting sensors and cameras, releasing the bumper clips, and refitting in reverse sequence.
Flat rate times serve two practical purposes for owners:
Evaluating a repair quote: A labour quote significantly above the flat rate time for a given procedure warrants a direct question to the repairer. There are legitimate reasons a job might exceed flat rate, corrosion on fasteners, additional damage found during disassembly, or calibration requirements for replaced sensors, but these should be itemised and explained, not absorbed into a vague labour total.
Understanding why Tesla repairs cost more than equivalent work on a conventional vehicle: The flat rate times for Model X collision repairs are generally longer than equivalent procedures on steel-bodied vehicles. Aluminium panel alignment requires more time and skill than steel. Sensor and camera recalibration after bumper or door replacement adds time that has no equivalent on older vehicles. Knowing this prevents owners from assuming a high quote is automatically inflated.
A practical reference for common collision-adjacent flat rate categories:
Procedure | Typical Flat Rate Range | Notes |
|---|
Front bumper cover R&R | 2.0-3.5 hours | Increases if radar/camera calibration required |
Rear bumper cover R&R | 1.5-2.5 hours | Sensor disconnect adds time |
Front door skin replacement | 3.0-5.0 hours | Aluminium alignment is time-intensive |
Falcon wing door assembly R&R | 4.0-6.0 hours | Includes post-fit calibration |
Front crash structure replacement | 6.0-10.0 hours | Structural work, alignment check mandatory |
Windscreen replacement | 2.0-3.0 hours | Camera recalibration required after |
Note: These ranges are indicative. Always verify against the model-year specific workshop manual flat rate schedule, as times vary between pre- and post-Palladium variants.
Sensor and Camera Recalibration After Collision Repair
This is the step that catches owners and inexperienced repairers off guard. The Model X's Autopilot and active safety systems depend on a network of cameras, ultrasonic sensors, and radar (on applicable model years) that are calibrated to precise angular and positional tolerances. Any repair that involves removing or replacing a bumper cover, a door mirror, a windscreen, or a structural panel in the sensor field of view requires a recalibration procedure before the vehicle's driver assistance systems are reliable.
Recalibration is not a visual check. It requires either a static calibration using a target board at specified distances and angles, or a dynamic calibration drive under specific conditions, or both, depending on which sensors were disturbed. Tesla's diagnostic software guides the procedure, but the physical setup requirements (flat surface, correct lighting, specific target positioning) mean that a workshop not equipped for this step cannot complete a compliant repair.
When requesting a collision repair quote, ask explicitly: does the quote include sensor recalibration, and what equipment does the repairer use to perform it? A repairer who cannot answer this question clearly is not equipped to return a Model X to a safe operational state after any repair that touches the sensor envelope.
Pro TipFor owners in Kettering and the surrounding area, confirming that an independent repairer has access to Tesla's current workshop manual and the appropriate calibration equipment is the most important due diligence step before authorising any collision repair. The repair itself may be technically sound, but without calibration, the vehicle's safety systems will not function as designed.
As documented in Tesla's collision repair guidelines, specific structural components require replacement rather than repair under any circumstances, and approved repair procedures must be followed to maintain the vehicle's designed crash performance and any remaining warranty coverage.
Warranty vs. Out-of-Pocket Costs: Making the Right Call
No competitor guide maps out exactly where Tesla's warranty ends and your wallet begins. This section does that in plain English, because the boundary is not where most owners assume it is, and the cost of misunderstanding it can run into thousands.
What Tesla's Warranty Actually Covers
The Model X ships with two distinct warranty layers, and conflating them is the most common planning mistake owners make:
New Vehicle Limited Warranty: Four years or 50,000 miles (whichever comes first). Covers defects in materials and workmanship across the body, interior, and most vehicle systems. This is the warranty that covers falcon wing door actuator failures, suspension control module faults, and touchscreen defects, provided Tesla classifies them as manufacturing defects rather than wear.
Battery and Drive Unit Warranty: Eight years with no mileage cap on the Long Range and Performance variants (the standard range, if applicable to your model year, carries a lower mileage limit, check your specific documentation). This covers the high-voltage battery pack and the front and rear drive units against defects and capacity loss below 70% of the original rated capacity.
What neither warranty covers, under any circumstances:
Brake pads and rotors (wear items)
Wiper blades
Tyres
Cabin air filter and HEPA filter
Brake fluid (even though it degrades on a time basis)
Drivetrain oil (fluid changes are a maintenance item, not a defect)
Cosmetic damage, including paint chips and interior scuffs
Damage resulting from non-Tesla-approved modifications
Watch OutBrake fluid is the most misunderstood item on this list. It degrades on a time basis regardless of mileage, Tesla recommends replacement every two years, and it is explicitly excluded from warranty coverage. Budget for it as a fixed biennial cost, not a warranty claim.
The Grey Zone: Where Disputes Actually Happen
The genuinely contested territory sits between clear defects and obvious wear. These are the fault categories where Tesla service centres apply discretion, and where owners are most likely to be surprised:
Air suspension struts: The air struts are a known wear item on higher-mileage Model X vehicles, but strut failures on lower-mileage examples within the four-year window are frequently covered as defects. The determining factor is usually mileage relative to age: a strut failure at 30,000 miles in year three is treated differently from the same failure at 48,000 miles in year four. If you are approaching the warranty boundary, get the suspension inspected before the clock runs out.
Falcon wing door actuator motors: These are mechanical components subject to wear, but early failures, particularly on vehicles under three years old, are generally covered. Tesla's service centres have replaced actuator motors under warranty on vehicles with documented door fault codes. The key is having the fault code on record before the warranty expires, even if the repair is deferred.
Brake caliper seizure: A seized caliper caused by infrequent physical brake use is the most contested item in this category. Tesla's position is that caliper maintenance is an owner responsibility; the counter-argument is that the vehicle's regenerative braking system is the reason the physical brakes see so little use. In practice, warranty coverage for caliper-related damage is inconsistent and depends heavily on the individual service centre's interpretation.
Touchscreen and MCU failures: The media control unit has a documented failure history on earlier Model X variants. Tesla has extended coverage for MCU failures on affected vehicles beyond the standard warranty period in some markets, it is worth checking whether your vehicle's VIN falls within any extended coverage programme before paying for an out-of-warranty replacement.
The Pre-Expiry Inspection: The Most Cost-Effective Thing You Can Do
The single highest-return action available to a Model X owner approaching the end of their four-year warranty is a comprehensive pre-expiry inspection by a qualified specialist. The logic is straightforward: any fault identified and documented before the warranty expires can be presented to Tesla as a warranty claim. The same fault identified a week after expiry is an out-of-pocket repair.
A thorough pre-expiry inspection should cover:
Full diagnostic scan for stored and pending fault codes across all vehicle systems
Air suspension height and levelling behaviour assessment
Falcon wing door sensor calibration check and actuator function test
Brake caliper slide pin condition and pad wear measurement
Battery health assessment including capacity retention against rated specification
Drivetrain oil condition check
Touchscreen and MCU function verification
Document everything. A written inspection report from a qualified EV technician carries weight when presenting a warranty claim, particularly for faults that Tesla might otherwise classify as borderline.
Out-of-Warranty Cost Planning: What to Budget
Once the four-year vehicle warranty expires, the cost landscape changes significantly. The eight-year battery and drive unit warranty remains in force, which means the most expensive potential failure, battery pack replacement, is still covered for capacity loss below 70%. But everything else is now on your account.
A realistic out-of-warranty maintenance and repair budget for a Model X should account for:
Item | Typical Interval | Approximate Cost Range |
|---|
Brake fluid replacement | Every 2 years | £80-£150 at an independent specialist |
Cabin air filter + HEPA filter | 2-3 years | £60-£120 parts, DIY-able |
Tyre rotation | Every 10,000-12,000 miles | £30-£60 |
Drivetrain oil service | Per workshop manual interval | £150-£300 depending on variant |
Brake caliper service | Annual on high-regen vehicles | £80-£160 per axle |
Air strut replacement (if needed) | Condition-dependent | £600-£1,200 per corner including labour |
Falcon wing actuator motor | Condition-dependent | £400-£900 per door including labour |
Pro TipLabour rates at independent EV specialists are consistently lower than Tesla service centre rates for out-of-warranty work. The difference on a multi-hour job, such as an air strut replacement, can be several hundred pounds. The condition is that the independent technician must hold appropriate high-voltage EV qualifications and have access to the current workshop manual. Confirm both before booking.
For parts sourcing, buying directly rather than through a service invoice reduces costs meaningfully. Components such as wheel nuts and a pyro fuse are available from specialist suppliers at a fraction of the main dealer bundled price. The same applies to drivetrain consumables: KMC Electric stocks drive train oil and oil filters for Tesla vehicles, which allows owners and independent technicians to source correctly specified parts without the dealer margin.
According to Which? consumer guidance on EV servicing costs, independent EV specialists consistently offer more competitive labour rates than manufacturer service centres for out-of-warranty work, without compromising on technical quality when the technician holds appropriate EV qualifications.
Key TakeawayThe warranty vs. out-of-pocket decision is not made at the point of failure, it is made in the months before the four-year warranty expires. A pre-expiry inspection is the most cost-effective investment a Model X owner can make, and it costs a fraction of a single out-of-warranty repair on a fault that could have been claimed.
Why Independent Tesla Specialists in Kettering Are Worth Considering
The case for using an independent Tesla specialist near you, particularly for out-of-warranty vehicles, comes down to three things: technical competence, cost transparency, and flexibility.
Tesla service centres in major cities are often booked weeks out, and the fixed-price service structure doesn't always reflect the actual complexity of a specific repair. An independent specialist with genuine Tesla expertise can often assess, quote, and complete a repair faster, with a clearer breakdown of parts and labour costs.
KMC Electric, based in Kettering, Northamptonshire, holds Level 4 Master Technician status in electric vehicles, with EV qualifications dating to 2016. That's a meaningful distinction: it means the technicians working on your Model X understand high-voltage systems, battery management, and Tesla-specific diagnostic procedures at a depth that general garages simply don't have.
For owners across Kettering and the wider Northamptonshire area searching for Tesla repair near me, the combination of specialist knowledge, independent battery health verification, and access to correctly sourced parts makes a qualified independent specialist the practical choice for anything outside the standard warranty period.
The throughline of this entire tesla model x repair guide is straightforward: the Model X is a sophisticated vehicle that rewards owners who understand its systems, plan maintenance proactively, and choose their repair partners carefully. Cutting corners on torque specs, skipping brake fluid changes, or ignoring early fault codes all lead to the same place: a larger bill later.
For further reference on EV maintenance best practices, the Institute of the Motor Industry's EV technician standards provides useful context on what qualifications independent EV technicians should hold before working on high-voltage vehicles.
Tesla Model X ownership gets complicated the moment the warranty expires, and that's exactly when most owners realise they need a specialist they can trust. KMC Electric provides professional diagnosis, cost-effective repair, and independent battery health verification for Model X owners in Kettering and across Northamptonshire, backed by over 25 years of automotive experience and Level 4 Master Technician status in electric vehicles. Get in touch with KMC Electric and protect your investment with expert care that goes beyond what a main dealer appointment can offer.
Frequently Asked Questions
Can you repair a Tesla Model X yourself?
Some Tesla Model X repairs are suitable for confident DIYers, tasks like replacing wiper blades, cabin air filters, HEPA filters, and rotating tyres can be done at home with basic tools. However, high-voltage systems, suspension work, falcon wing door calibration, and anything requiring diagnostic software should be handled by a qualified EV technician. Attempting high-voltage repairs without proper training is genuinely dangerous and may void any remaining warranty coverage.
What are the most common problems with the Tesla Model X?
Tesla Model X common problems include falcon wing door sensor faults and misalignment, suspension wear, particularly on air suspension variants, brake caliper corrosion from regenerative braking reducing pad contact, and touchscreen or MCU failures on older Palladium-era models. Wiring harness issues and drivetrain oil leaks have also been reported. Many of these faults can be identified early with a proper diagnostic scan before the warranty expires, saving significant out-of-pocket costs.
How do I access Tesla diagnostic software for the Model X?
Tesla's official diagnostic software is primarily available to Tesla Service Centres. Independent specialists with the right EV qualifications can access third-party diagnostic tools that read Tesla-specific fault codes and live data. As a Tesla Model X owner, your best option is to use the in-car diagnostics via the touchscreen service menu for basic checks, or book a diagnostic session with a qualified independent EV specialist who has access to professional-grade Tesla diagnostic software.
Is it expensive to repair a Tesla Model X out of warranty?
Out-of-warranty Tesla Model X repairs can be costly at main dealerships, where labour rates and parts pricing reflect the official network. Independent EV specialists typically offer more competitive flat rate times and labour costs without compromising on quality. Common jobs like brake fluid changes, air filter replacement, and brake caliper cleaning are relatively affordable. Larger repairs, suspension overhauls, drivetrain work, or falcon wing door actuator replacement, vary widely, so always get an itemised quote before committing.
Tesla publishes a service manual and workshop manual through its official repair procedures documentation, accessible via Tesla's service portal. These cover torque specs for every fastener, wiring diagrams, parts catalog references, and flat rate times. For practical use, a crowsfoot wrench or offset wrench is often needed to reach recessed fasteners accurately. Independent garages with Level 4 Master Technician status typically work from these same specifications, ensuring repairs meet OEM standards even outside the main dealer network.